University units can use the campus map to mark out event sites, specific locations, or to visualize information that pertains to a certain place. And doing this isn’t as hard as it sounds.
To make your points appear on the map, you’ll have to create a KML file that contains all the information about those points. I’ll show you how to do that.
First, you’ll need to open up Google Earth. Google Earth is a pretty nice program that may remind you of Google Maps, but it has more powerful features and is somewhat different to navigate. The biggest difference is that everything is in 3D – before the introduction of the Earth feature in Google Maps, this was the only way users could experience this sort of real-world texturing with 3D models and terrain. You’ll have to navigate to wherever you want to place your points; presumably this will be in Springfield or near Missouri State’s campus.
Making Points
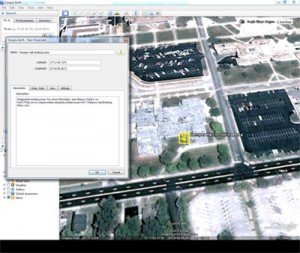
 Once you’re looking at the area you want to add your point to, you’ll need to press the Add Placemark button. Located just above the viewer window, it looks like a yellow thumbtack. This will put a placemark in the center of your viewer, which you can drag to exactly the correct location. You can also edit the name of what you’re marking and write a short description in the New Placemark window that appears. Once you click the OK button, the placemark will be added to your “Places” in the sidebar. If you’re going to create more than once placemark, it’s a good idea to make a single folder that you can put all of them in. You can do that by pressing Ctrl+Shift+N or clicking “Add Folder” under the Add menu.
Once you’ve created all your placemarks, highlight the folder that contains ONLY them and copy it by pressing Ctrl+C. This will put the code that describes the placemarks in your clipboard. If you open up a text editor like Notepad on Windows, you can paste it there. At first it will contain a lot of excess information, but you’ll need to edit it and remove everything inside the <Style> and <LookAt> tags. After some trimming, your file should look something like this by the time you’re done with it:
<?xml version="1.0" encoding="UTF-8"?> <kml xmlns="http://www.opengis.net/kml/2.2" xmlns:gx="http://www.google.com/kml/ext/2.2" xmlns:kml="http://www.opengis.net/kml/2.2" xmlns:atom="http://www.w3.org/2005/Atom"> <Document> <name>Missouri State University Designated Smoking Areas</name> <Placemark> <name>Power House Smoking Area</name> <description><![CDATA[Designated smoking area. For more information, see Missouri State's <a href="http://www.missouristate.edu/policy/tobaccouse.htm"> Tobacco Use/Smoking Policy</a>.]]></description> <Point> <coordinates>-93.27892451338917,37.19760625199317,0</coordinates> </Point> </Placemark> </Document> </kml> |
That’s just for one point. If you have multiple points, they’ll appear as additional items inside a <Placemark> tag. Remember, if you copy a single placemark from Google Earth, you’ll only get that placemark pasted to your code. Putting everything in the same folder makes sure you have it all copied over.
Once you’ve cleaned up the file, you can save it; be sure to type in the .kml extension after your filename so that it works correctly. So long as you upload that file to a working URL it will work with the map.
Shaded Areas
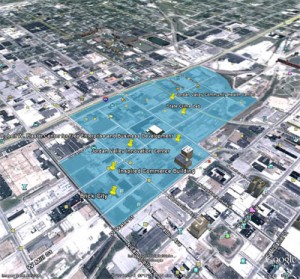
 If you want to show a shaded area in your KML file, there’s just a little more legwork involved. When in Google Earth, next to the “yellow thumbtack” Add Placemark button, there’s an “Add Polygon” tool (with a little hexagon in it). Clicking it will let you start drawing a shape on the map, and open a window letting you edit the information of that shape. Just type in a name and a description; we won’t use the rest of those features. Don’t click OK yet – once you do that, Google Earth will think you’re finished making your polygon.
Click on the map where you’d like the first point or edge to the shape you’re drawing. After clicking at least 2 additional points at other angles, you’ll see a white area appear where your polygon currently covers. Keep clicking the points at the corners of the area you’re creating; if you accidentally click somewhere you didn’t intend to, you can press delete to eliminate preceding points. If you click and drag, you’ll create a curved line by laying down multiple points very close together. Most of the time you shouldn’t need to do this.
After you’ve laid down your last point, you can always fine tune your polygon by clicking and dragging the points you’ve already made to where you want them to be. This will also let you see where exactly the line between points falls. When you’re done, click OK on the New Polygon window. You can also go back and edit where your points are later by right-clicking the polygon (which shows up in the “Places” partition of the sidebar) and clicking Properties. This will take you back to the drawing and editing process.
After the polygon has been created, copy it with Ctrl-C, just like you would a placemark, and paste it into Notepad or Textpad. If you copy just that polygon, you’ll wind up with the extra KML you wouldn’t get if you copied a folder with the rest of the points or even other polygons you may want to include. This time, you’ll need to include a little extra code. Beneath the <name>*Your document’s name*</name> tags, put this:
<Style id="my_styles"> <LineStyle> <color>ffadaaa2</color> </LineStyle> <PolyStyle> <color>bce0bc54</color> </PolyStyle> </Style> |
And then put this inside your polygon’s <Placemark> tags, beneath the name of the area.
<styleUrl>#my_styles</styleUrl> |
 Just put your own name for the style instead of “#my_styles”. You’ll need to pick a color to use though – KML code for colors is a bit strange, so I used KML Color Converter to get it right. This will let you pick a color already on your screen and set a transparency level you feel is good. Just replace the color code inside the <PolyStyle> tags to get it to look how you’d like.
Once all that is done, you can save your file and upload it somewhere live that works for you.
Using your KML with the map
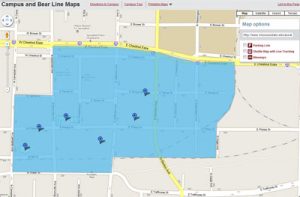
Go to the map. Click the map button, then in the text box where it says “Search map,” enter the url of your KML. The KML I made for IDEA Commons is here : http://www.missouristate.edu/assets/ideacommons/IDEAoutlinenbuild.kml. So copy that address, and paste it in the text box. You’ll see what my overlay and points looks like. Using the URL for your kml will display what you’ve created. Once you’re looking at it on the map, click the “Link to this Page” link above the map buttons, below the Missouri State Search box at the top right of the page. You’ll see a small window open with a direct link to that map, and some html code that will embed it in your web page. Either of these will be useful to lead users straight to this page, rather than having them copy/paste the long url for your file.
- Are you the next new media specialist intern? - November 13, 2017
- Social Media Kit: Public Affairs Convocation 2017 - October 24, 2017
- Social Media Kit: Public Affairs Week 2017 - August 22, 2017
- Creating points and shaded areas on the map - December 2, 2010
- Missouri State Featured in iTunes U - December 3, 2009
- Missouri State courses featured in iTunes U - August 18, 2009
